I’ve been working on a project, Unipept, as part of my master’s dissertation in Computer Science for the last year. Unipept is an open source web-based tool that allows researchers to process metaproteomics data sets and visualize the analysis results. Setting up Unipept for development on your pc takes some time as you need to build the database, install ruby, install all necessary dependencies, etc. Last week I decided to reset my Windows 10-installation and reinstall Unipept using Visual Studio Code’s new remote development feature.
This feature allows you to develop and run applications using the default Visual Studio Code editor, but without needing to install these applications on your local operating system. You can, instead, use a Docker container with all necessary software dependencies and packages installed, and execute all applications in this container. The way that this feature is built for Visual Studio Code allows us to seamlessly work on a large and complex code base, without the need for hard and cumbersome configuration. In this blog post I will demonstrate how I set up the complete Unipept stack using a docker-compose.yaml file and how Visual Studio Code automatically leverages this file as a development environment. Note that all code is directly executed in the Docker container and that it runs completely isolated from your current operating system. Note that in order to be able to use VS Code’s remote development feature you need to install the remote development extension.
Visual Studio Code’s official documentation demonstrates how we can use a Dockerfile as the basis of the remote development concept, but stays relatively opaque about using Docker compose for this. After searching the web for a bit, I found the following demonstration video on YouTube.
If we look carefully to the resources used in this video, we can see that this example is using a docker-compose.yaml file as the basis for a development stack. A link is also provided to the example project, which helps me a lot in figuring out how we should configure our Visual Studio Code project. My Docker stack needs a database with lots of read-only data (we can prefill this one, which I will demonstrate in the next blog post) and a working Ruby-on-Rails installation with support for Webpack, TypeScript and Vue. It is most simple to start of with one of Visual Studio Code’s Docker templates. I chose for a Ruby 2 template, but loads of other templates are also available.
Configuring VS Code using .devcontainer
All settings and Dockerfiles are stored inside of the .devcontainer folder. The devcontainer.json file is what drives the remote development. You can indicate which VS Code extensions should be installed inside of your container, and which ports should be exposed. As we’re going to set up a complete development environment, including database and Ruby-container, I’m using the Docker Compose approach. My complete configuration file looks like this:
// See https://aka.ms/vscode-remote/devcontainer.json for format details.
{
	"name": "Unipept",
	"dockerComposeFile": "docker-compose.yml",
	"service": "app",

	// Uncomment the next line if you want to publish any ports.
	"appPort": [5000, 8080],

	"workspaceFolder": "/workspace",

	"extensions": [
		"rebornix.Ruby",
		"octref.vetur",
		"ecmel.vscode-html-css",
		"vscode-eslint"
	]
}
Using the Docker Compose approach means that some things need to be configured differently in comparison to the Dockerfile approach. First, we need to define which folder in the container contains all code using workspaceFolder (we will be using this folder in our Dockerfile later on). Second, we need to tell Visual Studio Code which of the services defined in our docker-compose.yaml file is the main development container. My main service is called app. As I will be developing Ruby code, as well as Vue, HTML, CSS and TypeScript, I need a selection of different extensions.
Setting up our containers
Now that we’ve fully configured VS Code, we need to start configuring the containers themselves using the docker-compose.yaml and appropriate Dockerfiles. I need three different containers: one for our database (MySQL), one for PHPMyAdmin which allows us to explore our database and one for the actual development itself (Ruby, Rails, Webpack, etc). I’m not going to bother about the actual content of the database itself here, and I will be using a plain image from the Docker Hub. An image for PHPMyAdmin is also directly available, leaving us only with the Dockerfile for the Ruby-on-Rails-container that we need to configure ourselves. Our docker-compose.yaml file is quite extensive and needs a bit of an explanation.
Docker compose
version: '3.7'

services:
  db:
    image: mysql:5.7
    environment:
      MYSQL_ROOT_PASSWORD: rootpass
      MYSQL_DATABASE: dbname
      MYSQL_USER: username
      MYSQL_PASSWORD: userpassword
    restart: always
    ports:
      - '3306:3306'
    hostname: mysql
  phpmyadmin:
    depends_on:
      - db
    image: phpmyadmin/phpmyadmin
    ports:
      - '8080:80'
    environment:
      PMA_HOST: db
      MYSQL_ROOT_PASSWORD: rootpass
    restart: always
  app:
    depends_on:
      - db
    build: ./unipept-application
    command: sleep infinity
    ports:
      - '5000:5000'
    volumes:
      - ~/.gitconfig:/root/.gitconfig
      - ..:/workspace
Most of this file is self-explanatory, but some parts are a bit more confusing. Our app service contains the sleep infinity command. VS Code uses this service as the main service in our case, and exposes it directly to the user as a shell. As this container does not start a new server by itself, it is quickly done executing and stops automatically. But we don’t want the image to stop, we need it to be online so that we can access it’s shell and run commands manually. By telling it to ‘sleep’ for infinite amount of time, it stays online until we explicitly stop it.
The code that we want to execute resides on your host computer, but needs to be available inside of the container. By mounting the development code as a new volume in our container, we can access and execute it. I chose to mount my code as the workspace folder in the container, and that’s also why we had to indicate this folder as the workspaceFolder in the .devcontainer.json earlier in this post.
Ruby container Dockerfile
The Dockerfile that defines our Ruby-development image resides in the folder .devcontainer/unipept-application. This file in itself is not very special. It simple consists of extending the official ruby:2.4.5 image and installing rails. We also need to build oj from source. This is a Ruby gem that provides an easy way to serialize objects into JSON-files and vice-versa.
FROM drecom/ubuntu-ruby:2.4.5

ENV MAINTAINER="Pieter Verschaffelt (pieter.verschaffelt@ugent.be)"

RUN mkdir /workspace
WORKDIR /workspace

# Install ruby-debug-ide and debase
RUN gem install ruby-debug-ide
RUN gem install debase
RUN gem install bundler

# Install git, process tools
RUN apt-get update && apt-get -y install git procps nodejs mysql-client dos2unix

# Build oj from source
RUN gem install oj -v '2.17.5' --source 'http://rubygems.org/'

# Clean up
RUN apt-get autoremove -y \
    && apt-get clean -y \
    && rm -rf /var/lib/apt/lists/*

# Set the default shell to bash instead of sh
ENV SHELL /bin/bash
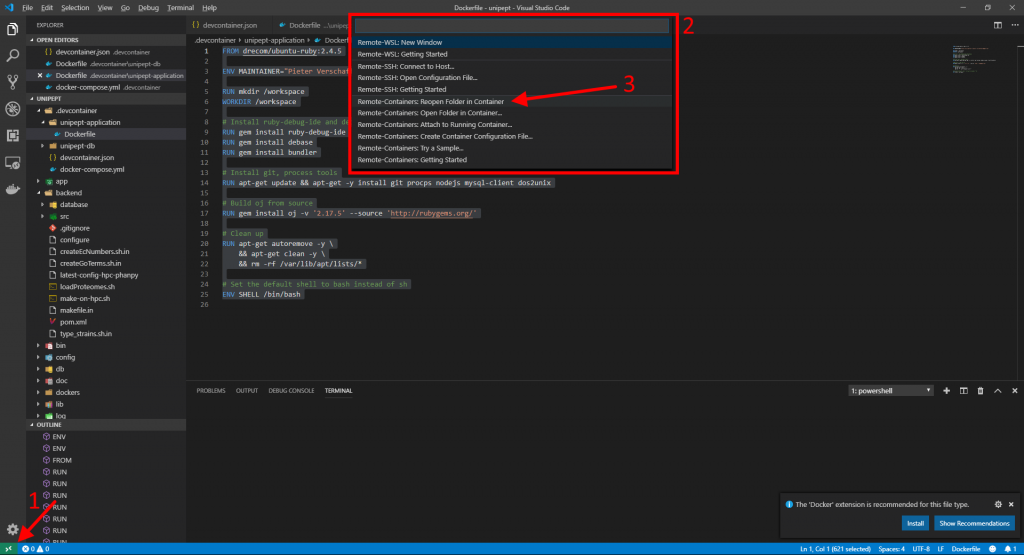
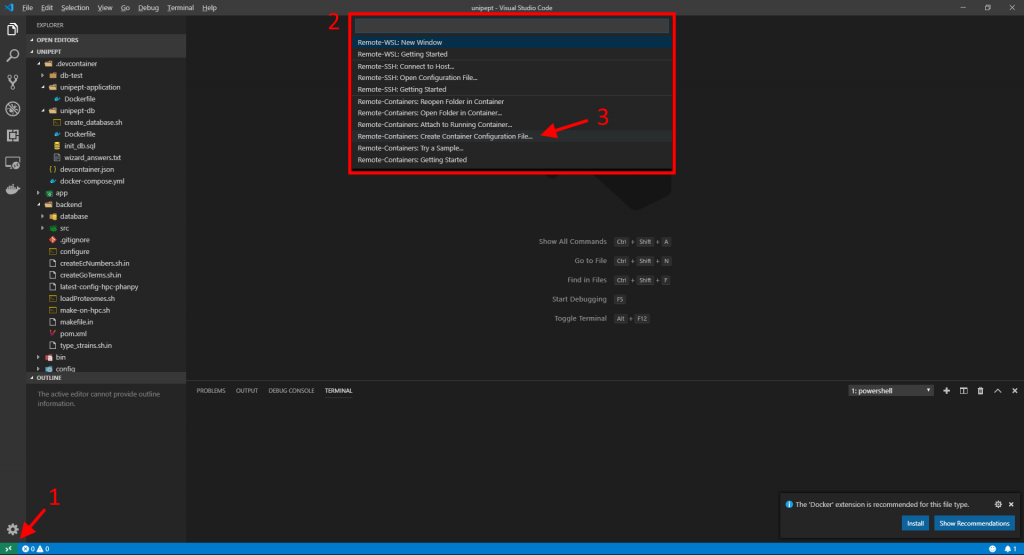
Starting remote development
We are practically done now, and we can start developing in our Docker container. You can easily push your complete repository (including the .devcontainer folder) to GitHub and clone it on a new computer. As long as VS Code and Docker are installed, you can start hacking away without the need for installing Ruby, Rails, Yarn, Webpack, MySQL, etc. Please leave a comment below if you found this guide helpful or if you have questions.